Support material is easy to see in the slicer and easy to underestimate in a quote. Every support gram is purchased filament that does not become the product, but deleting supports indiscriminately can turn a small material saving into a failed print or hours of surface repair. The economical setup is the one that meets the part’s dimensional and cosmetic requirements at the lowest expected total cost—not simply the one with the lowest support percentage.
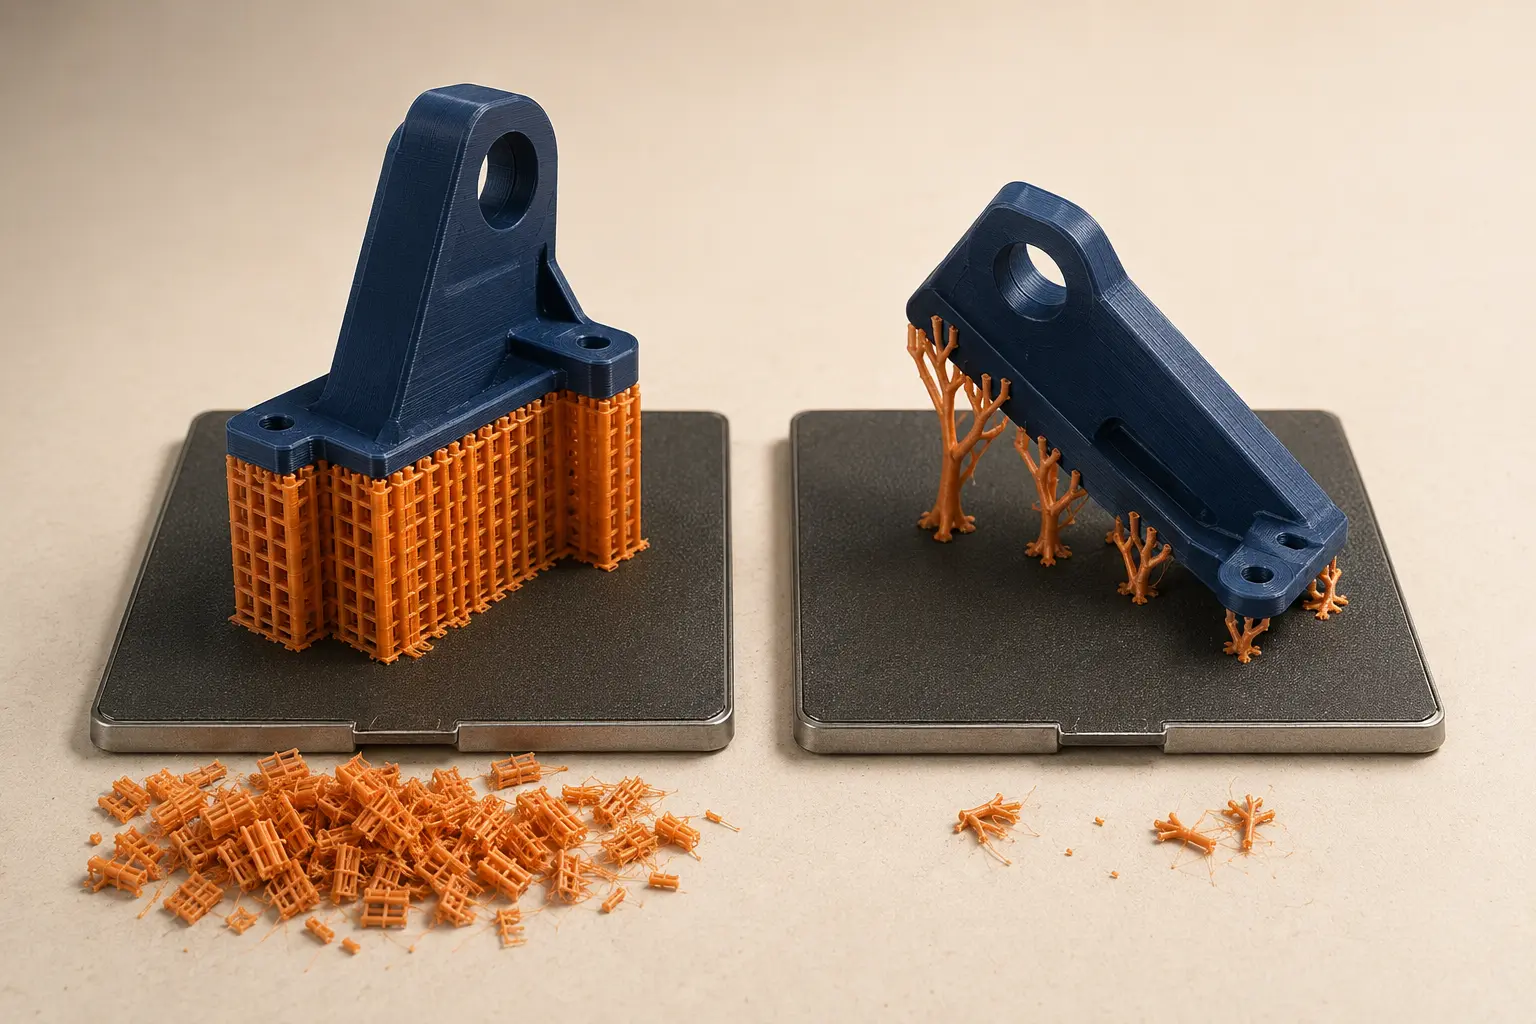
1. Count more than the filament that becomes support
Start with the slicer’s total filament estimate, not the model-only weight. Support trunks, interfaces, rafts, brims, and purge used for a different interface material all leave the spool. Multiply those grams by the cost per gram, but keep the categories separate so a later orientation change reveals where the saving came from.
Material can be the smallest support expense. Removal takes hands-on time, tools wear out, a scarred face may need sanding, and a broken support can lose the entire build. Soluble interfaces add expensive material, storage requirements, tool changes, and dissolution time. Record post-processing minutes and rejected parts alongside support grams to compare settings honestly.
2. Reorient the part only after checking every cost that moves
Rotating a model can reduce overhang area, but it may increase Z height and machine time. It can also move layer lines across the load direction, shift support marks onto a customer-facing surface, or create a small first-layer footprint that needs a brim. Compare complete slicer summaries for two or three credible orientations rather than optimizing the support number in isolation.
Choose the surfaces that can tolerate support contact before slicing. A hidden underside may accept a rough interface while a sealing face, snap fit, or visible curve may not. If the best mechanical orientation creates unacceptable marks, splitting the model and adding a designed joint can be cheaper than extensive finishing or repeated rejects.
- Compare total grams, print time, Z height, and first-layer area.
- Check whether layer direction still suits the real load.
- Keep support contact away from critical dimensions and visible faces.
- Include any added assembly or finishing time after splitting a part.
3. Use the lightest stable structure, not the sparsest-looking preview
Grid and snug supports can create predictable broad foundations, while organic or tree-style supports can reach isolated overhangs with less material and fewer contact points. The visually lighter option is not automatically safer: long branches, small feet, nozzle collisions, and tall narrow towers may become failure points. Stability matters more as the build gets taller.
Tune support only where geometry requires it. Build-plate-only supports, painted enforcers, blockers, variable density, and local modifiers can prevent the slicer from filling cavities that already bridge successfully. Run a small representative test when reducing density, branch diameter, or interface coverage instead of learning on the largest customer job.
4. Treat interface settings as a labor-versus-surface decision
A dense support interface can improve the underside and make overhang geometry more consistent, but it consumes more material and may bond too strongly. A large contact gap removes easily but leaves sagging lines that require sanding or fail a visual standard. The right gap, interface count, pattern, and cooling depend on material, layer height, nozzle, and the direction of the supported face.
Measure the minutes required to remove support and finish the surface for each preset. Saving twenty grams is not a saving if it adds half an hour of skilled finishing. Conversely, a disposable fixture or internal feature may not justify a premium soluble interface. Store separate presets for cosmetic, dimensional, and utility parts rather than forcing every job through one compromise.
5. Price the validated support workflow and preserve its assumptions
For a repeat product, save the model orientation, support preset, material, total sliced grams, print time, post-processing time, and observed failure rate with the quote. Those values become the production recipe. If a customer changes a critical face or material, reslice and reprice instead of assuming the original support cost still applies.
Support optimization creates profit when the sales price remains tied to the value and specification of the finished part. A better orientation may reduce internal cost without reducing customer value. Use the saving to protect margin, shorten lead time, or offer a deliberate volume discount—do not automatically give away every process improvement.
References and further reading
These manufacturer and technical references support the workflow described above. Use them as a starting point, then validate costs and settings in your own workshop.
Test your numbers